Account Setup And Safety Checklist
Once an account has been created and the first login is complete, the next priority should always be security. Crypto exchanges function as custodial platforms, which means they temporarily hold user funds while trading activity takes place. Because of this, exchange accounts become valuable targets for phishing attacks, credential theft, and unauthorized access attempts.
Before depositing meaningful funds or placing multiple trades, it is worth taking a few minutes to review the essential security settings available inside the account dashboard.
Must-Do Security Settings
After logging into the account for the first time, users will find several security tools inside the Account & Security section of the platform. These tools create additional verification layers that protect the account even if login credentials become exposed.
The most important setting to activate immediately is Two-Factor Authentication (2FA). When enabled, logging in or initiating withdrawals requires a time-sensitive verification code generated by an authentication application such as Google Authenticator. This means that even if someone obtains the account password, they still cannot access the account without the authentication code from the user’s device.
Another useful protection is the anti-phishing code. This feature allows users to set a custom phrase that will appear in all legitimate emails sent by the exchange. If an email claiming to be from Bybit arrives without that phrase, it is a strong signal that the message may be a phishing attempt designed to steal login credentials.
Users should also review the withdrawal address whitelist feature if it is available within their account region. This security setting restricts withdrawals to a list of pre-approved wallet addresses. Even if an attacker somehow gained account access, they would not be able to send funds to a new wallet without first modifying the whitelist.
Finally, the device management section allows users to monitor which devices have logged into their account. Any unfamiliar device can be removed immediately, terminating its session and forcing a fresh login.
Activating these protections only takes a few minutes but creates a much stronger security posture for the account.
Common Account Mistakes
While most exchanges provide strong security infrastructure, many account compromises still occur because users overlook simple precautions.
One of the most frequent mistakes involves reusing passwords across multiple websites. If another service experiences a data breach and the same password is used for the exchange account, attackers may attempt automated login attempts across various platforms.
Using a unique password for crypto accounts dramatically reduces this risk. Password managers make this much easier by generating and storing complex passwords automatically.
Another common mistake involves skipping recovery preparation. Authentication apps, backup codes, and recovery options should always be stored safely in case the device used for authentication is lost or replaced. Without recovery access, regaining control of the account can become significantly more complicated.
These may seem like minor details at the beginning, but they can make a significant difference in protecting funds over the long term.
What Unified Trading Account (UTA) Means For Beginners
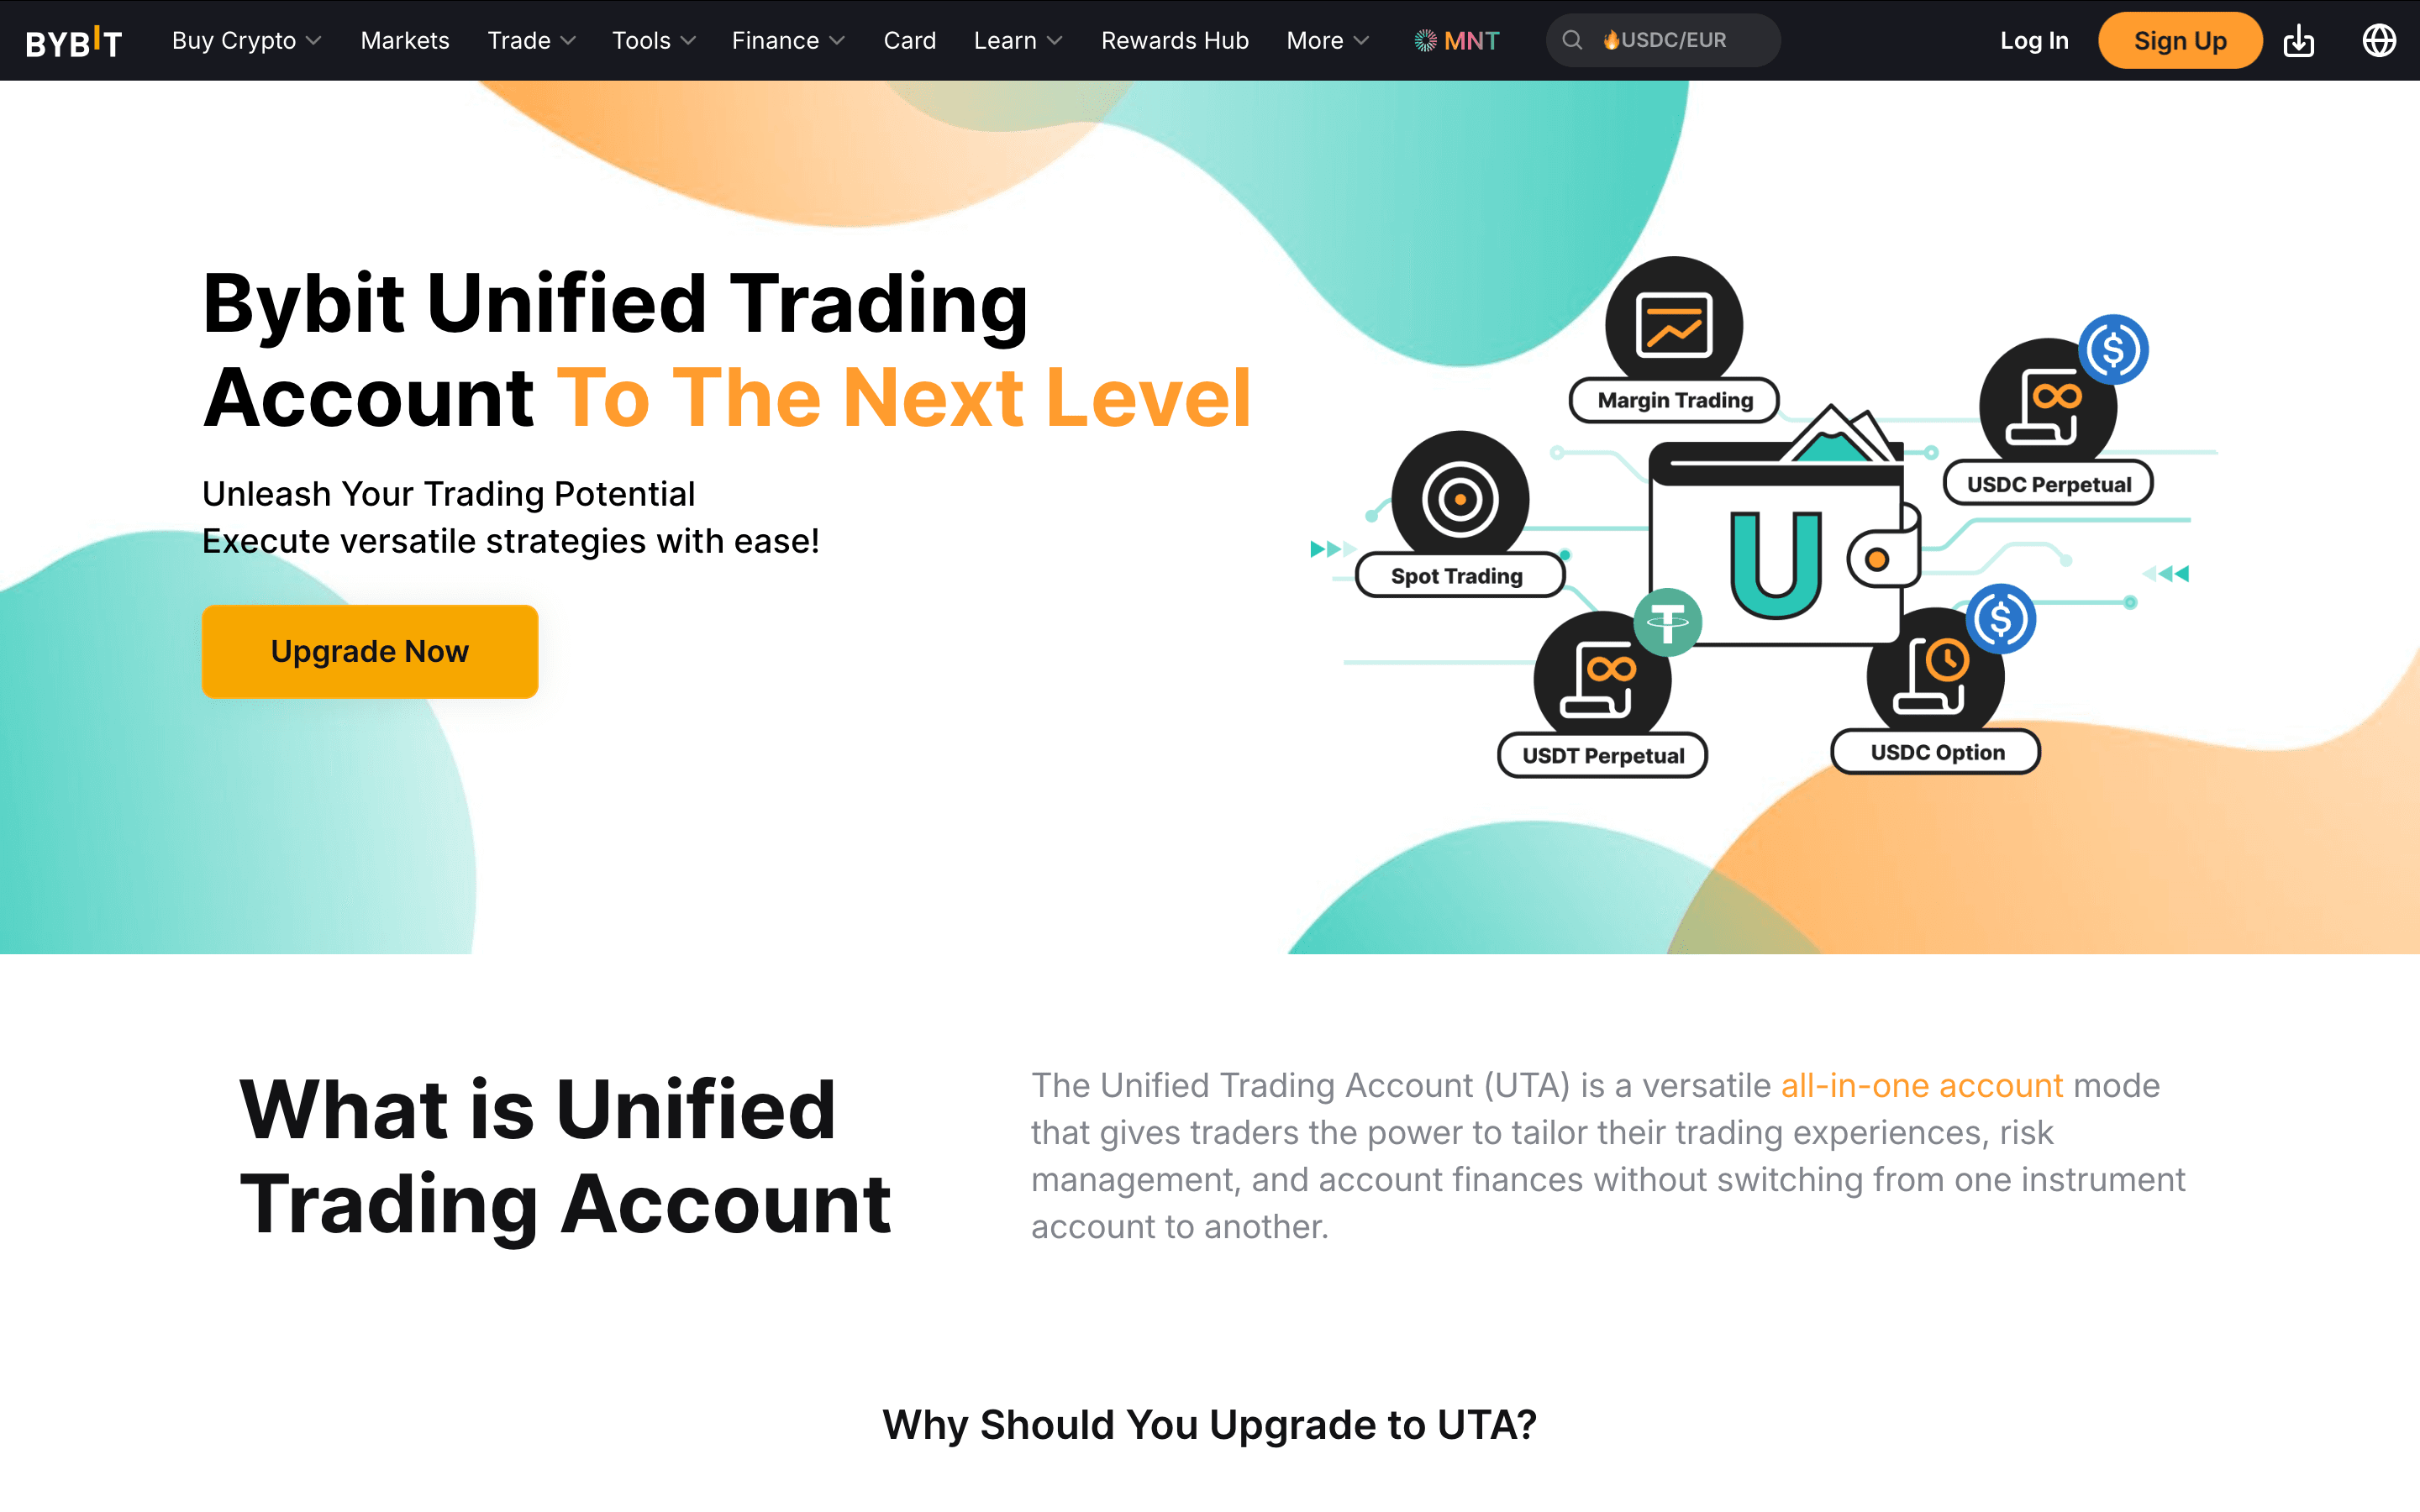
Unified Trading Account (UTA) Combines Spot and Derivatives Balances into One Margin Account
As users explore the Bybit interface, they may notice references to something called the Unified Trading Account (UTA). For newcomers, this terminology can sound complicated, but the concept itself is fairly straightforward. Traditionally, crypto exchanges separated trading activities into multiple account wallets. Users might need to move funds between Spot accounts, derivatives accounts, or margin accounts before placing trades in different markets.
The Unified Trading Account simplifies this structure by allowing a single account balance to act as collateral across multiple trading products. Instead of constantly transferring funds between internal wallets, the system manages the allocation automatically behind the scenes.
For beginners, the key point is simple: UTA does not require any special action to begin trading.
If the platform prompts users about Unified Trading Account features, there is no need for concern. Beginners can simply open the Spot trading interface and begin learning the platform layout without interacting with the more advanced derivatives features tied to the unified system.
As experience grows and traders begin exploring additional markets, the Unified Trading Account structure becomes more useful. In the early stages, however, it simply functions as the underlying framework that keeps account balances organized.
Funding Your Bybit Account
Before placing a trade on Bybit, you first need to move funds onto the platform. That process is straightforward, but one detail often confuses new users: where those funds appear after they arrive.
Bybit separates balances across different internal account types depending on how the assets will be used. When you deposit crypto or purchase assets using fiat methods, the funds usually arrive in the Funding Account first. This account acts as the platform’s central wallet for deposits, withdrawals, fiat transactions, and peer-to-peer trading.
Actual trading activity, however, typically happens inside the Unified Trading Account. Because of this structure, many beginners deposit funds successfully but then do not see those assets inside the trading interface. In most cases, the funds are simply sitting in the Funding Account and need to be transferred internally.
Fortunately, internal transfers on Bybit are instant and free. Once assets arrive in your Funding Account, you can move them into the Unified Trading Account in just a few clicks.
Multiple Ways To Deposit Funds And Start Trading
Understanding The Funding Account And Unified Trading Account
Before looking at the different deposit methods, it helps to understand how these two account types interact.
The Funding Account acts as the main wallet for incoming and outgoing transactions. Deposits from external wallets, purchases made through fiat payment providers, and peer-to-peer transactions typically appear here first.
The Unified Trading Account (UTA), on the other hand, is where trading activity actually takes place. This account allows users to access Spot markets, derivatives products, and margin functionality without constantly switching between multiple trading wallets.
When assets move from the Funding Account to the Unified Trading Account, they immediately become available for trading. Because this is an internal movement within the exchange, the transfer occurs instantly and does not incur any blockchain or platform fees.
To move funds internally, follow this quick path:
Navigate to Assets in the main menu
Click Transfer
Select Funding Account → Unified Trading Account
Enter the amount to transfer
Confirm the transaction
Once the transfer is complete, the funds will appear in your trading balance and can be used immediately in Spot or derivatives markets.
Crypto Deposit
Depositing cryptocurrency from an external wallet is one of the most common ways to fund a Bybit account. This method is widely used by traders who already hold crypto on another exchange or in a private wallet.
To begin the deposit process, open the Assets section of your account and select Deposit. The platform will then ask you to choose the cryptocurrency you want to transfer. After selecting the asset, the interface will display a deposit address and the supported blockchain networks for that token.
At this stage, two details are extremely important:
The token you are sending
The network you are using
Many tokens operate on multiple blockchains. For example, USDT can be transferred using Ethereum (ERC-20), Tron (TRC-20), and several other networks. The network chosen when sending the funds must match the network selected on the deposit page.
A safe workflow for deposits usually looks like this:
Select the coin you want to deposit
Choose the correct network
Copy the provided wallet address
Send the funds from your external wallet
Wait for blockchain confirmations
Once the transaction receives the required confirmations on the blockchain, the funds will appear in your Funding Account.
A helpful precaution for first-time transfers is performing a small test deposit before sending larger amounts. This verifies that the wallet address and network selection are correct.
Buy Crypto With Fiat Using One-Click Buy
For users who do not already own cryptocurrency, Bybit provides an integrated One-Click Buy feature that allows assets to be purchased using traditional payment methods. This option can typically be found under the Buy Crypto or One-Click Buy section of the platform. The interface allows users to select the amount they wish to purchase and the cryptocurrency they want to receive.
Payment options vary depending on the user’s region, but commonly include:
Debit or credit cards
Bank transfers
Third-party payment providers
Bank Transfer vs Card: Which Should Beginners Use?
If you have both options available, bank transfers are often better for larger buys or repeat funding because they tend to have lower processing costs and fewer “card-style” approval issues. The trade-off is speed: bank transfers can take longer to clear depending on your bank and region.
Cards are usually the fastest route for a first, small purchase because they confirm quickly, but they can come with higher fees and occasional declines depending on your bank’s policy.
A simple beginner rule is: Use card for speed and small amounts, and switch to bank transfer for routine funding once you’re comfortable with the platform.
After completing the purchase, the acquired cryptocurrency is credited directly to the Funding Account. Fees, payment limits, and available providers may vary by country and payment method, so it is always worth reviewing the specific details shown during the purchase process.
P2P Trading
Another method of funding a Bybit account is through the platform’s peer-to-peer marketplace, commonly referred to as P2P trading.
In this system, users buy or sell cryptocurrency directly with other traders. Bybit acts as the intermediary by providing escrow protection, which holds the seller’s crypto until the payment has been confirmed.
The process typically follows these steps:
Select the cryptocurrency you want to purchase
Choose a seller from the list of available offers
Send the agreed payment using the seller’s payment method
Confirm the payment within the platform
Receive the crypto once the seller releases the escrow
To reduce risk when using P2P trading, it is wise to evaluate the reputation of the trading partner. Important indicators include completion rate, number of completed orders, and user feedback. Another important rule is to keep all communication inside the Bybit platform. Moving conversations to external messaging apps removes the protection provided by the escrow system.
Once the transaction completes, the purchased crypto will appear in your Funding Account, where it can be transferred internally to the Unified Trading Account for trading.
Understanding The Bybit Trading Screen
Once funds arrive in the account, the next step is navigating the trading interface itself. At first glance, the Bybit trading screen can look overwhelming. Charts, numbers, order panels, and trade data all appear on the screen at the same time.
However, the layout becomes much easier to understand once you realize that the interface is organized into a few core components. Each section of the screen serves a specific purpose. Some display market information, while others allow you to place orders or review existing trades.
Learning what each panel does helps prevent one of the most common beginner mistakes: clicking buttons without fully understanding what they control.
Once you understand the structure of the trading interface, placing orders becomes much more intuitive. And if you’re new to markets, our beginner’s guide to crypto trading explains how trades work, basic strategies, and the risk management habits every trader should understand
Learn How The Bybit Trading Interface Actually Works. Image via
BybitThe Five Parts Of The Interface
Although the trading screen may appear complex at first, it is built around five core elements that appear on most crypto exchanges.
Understanding how these components work together will make navigating the platform significantly easier.
- The first component is the pair selector, which allows traders to choose the market they want to trade. This menu lists available trading pairs such as BTC/USDT, ETH/USDT, and many others. Selecting a pair determines which asset is being traded and what currency is used for pricing.
- Next comes the chart panel. This area displays price movement over time and is where traders perform technical analysis. Bybit integrates charting tools that allow users to change timeframes, apply indicators, and analyze market structure.
- The third section is the order book. The order book shows the current buy and sell orders placed by other market participants. The buy side displays bids (orders to purchase), while the sell side shows asks (orders to sell). Watching the order book can provide insight into market liquidity and immediate supply and demand levels.
- The fourth component is the order entry panel, which is where trades are actually executed. This panel allows users to choose order types such as Market or Limit orders, and enter the amount they wish to trade.
- Finally, the bottom section of the interface displays positions, open orders, and order history. This area tracks active trades and provides records of previously executed orders.
Once traders understand these five elements, the trading interface becomes far less intimidating.
The Two Numbers That Confuse Everyone
Even after becoming familiar with the layout, beginners often encounter confusion around certain numbers displayed in the interface. Two pairs of numbers frequently cause misunderstandings: price metrics and account balances.
The first pair involves Last Price and Mark Price.
- The Last Price represents the most recent price at which a trade occurred on the exchange. This is the price most commonly referenced in Spot markets.
- The Mark Price, on the other hand, is mainly used in derivatives trading. It is calculated using external market data and helps prevent price manipulation from triggering unfair liquidations in leveraged positions.
For Spot trading, users will primarily focus on the Last Price. The Mark Price becomes more relevant when trading futures or perpetual contracts.
Another source of confusion involves Available Balance versus Total Balance.
- The Total Balance represents the full value of assets held in the account, including funds currently locked in open orders.
- The Available Balance represents the portion of funds that are free to use for new trades.
If a limit order has been placed but not yet executed, the funds allocated to that order will appear in the total balance but not in the available balance.
Understanding this distinction helps explain why the full account value cannot always be used for new trades at any given moment.
“Where Did My Money Go?”
Another question many beginners ask during their first trading sessions is why their funds appear to move between different wallet sections inside the platform.
Some exchanges separate user balances into internal wallets such as Funding wallets, Spot wallets, or derivatives wallets. These wallets exist primarily for organizational purposes and help the exchange manage funds used for different types of transactions.
For example, assets purchased through P2P trading may initially appear in the Funding wallet, while assets used for trading appear in the Spot wallet.
If funds are located in the wrong internal wallet for a specific activity, users can move them through a simple internal transfer process. These transfers occur instantly within the platform and do not involve blockchain transactions or network fees.
The transfer option can usually be found within the Assets section, allowing users to move funds between internal wallets with just a few clicks. Once traders understand these internal wallet structures, it becomes much easier to track where their funds are located and how they are being used within the platform.
Your First Spot Trade (Beginner Mode)
Now that the trading screen makes sense, the next step is executing an actual trade. For beginners, the safest way to start is through Spot trading using simple order types.
Spot trading means you are directly buying or selling an asset without leverage. If you buy Bitcoin through Spot trading, you actually own that Bitcoin, and it appears in your account balance after the trade completes.
This makes Spot trading easier to understand than derivatives markets, where traders speculate on price movements using borrowed capital.
Market Order
The simplest order type available on any exchange is the Market order. A Market order tells the exchange to execute the trade immediately at the best available price currently listed in the order book.
Because the order executes instantly, Market orders are commonly used by beginners who want the fastest path from decision to execution.
Inside the Bybit Spot trading interface, the order entry panel includes several tabs that represent different order types. To place a Market order, first select the Market tab in the order panel.
After selecting the order type, the next step is entering the amount you want to trade. This amount can usually be entered either as the quantity of the asset you want to buy or the amount of the quote currency you want to spend. Many interfaces also include percentage buttons that allow users to allocate a portion of their available balance.
The process typically follows this sequence:
- Navigate to Trade → Spot
- Choose the trading pair (for example, BTC/USDT)
- Select the Market order tab
- Enter the amount to buy or sell
- Click Buy or Sell
- Confirm the order
Once the order is submitted, the exchange immediately matches it with the best available orders from other traders. The purchased asset then appears in your Spot wallet balance.
Because Market orders execute immediately, they generally trigger what exchanges call taker fees, which are slightly higher than maker fees. The reason is simple: the order consumes existing liquidity in the order book rather than adding new liquidity.
Limit Order
While Market orders prioritize speed, Limit orders prioritize price control.
A Limit order allows traders to specify the exact price at which they want to buy or sell an asset. Instead of executing immediately, the order enters the order book and waits until the market reaches the specified price.
This approach is often used by traders who believe the market may move toward a more favorable price level before executing their trade.
For example, if Bitcoin is currently trading at $60,000 but a trader wants to buy it at $59,500, they can place a Limit order at that price. If the market later drops to that level, the order will automatically execute.
The steps for placing a Limit order are similar to the Market order workflow:
- Open Trade → Spot
- Select the desired trading pair
- Choose the Limit order tab
- Enter the desired price
- Enter the order size
- Submit the order
Because Limit orders add liquidity to the order book instead of removing it, they often qualify for maker fees, which are typically lower than taker fees.
In simple terms:
- Maker orders add liquidity to the market
- Taker orders remove liquidity from the market
Understanding this difference becomes useful later when trading more frequently.
Take-Profit And Stop-Loss
Even though Spot trading does not involve liquidation risk like derivatives markets, controlling downside risk is still important.
This is where take-profit and stop-loss orders become useful.
On Bybit, TP/SL controls are usually set from the position/order area rather than the main chart. After you place a trade, look at the bottom panel for Positions, Open Orders, or Order History.
If your trade is already filled (you’re holding the asset), go to Positions/Assets and look for a TP/SL button (or an Edit option that includes TP/SL).
If you placed a limit order that hasn’t filled yet, you’ll set protection from Open Orders by editing the order (where available) or by placing separate stop/trigger orders tied to that position once it fills.
The key habit is to treat TP/SL like a seatbelt: set it immediately after entry, not after the price starts moving.
A stop-loss order automatically closes a trade if the market moves against your position and reaches a specified price. This prevents small losses from growing into larger ones. A take-profit order performs the opposite function. It closes a position automatically once the asset reaches a target profit level.
For example, imagine a trader buys ETH at $2,000. They might set a stop-loss at $1,900 to limit downside risk and a take-profit at $2,200 to capture gains if the price rises.
These controls allow traders to manage risk even when they are not actively watching the market.
A widely used beginner guideline involves limiting how much of the account balance is exposed in a single trade. Many traders choose to risk only a small percentage of their capital on each position. This approach prevents a single mistake from causing major damage to the overall account.
While stop-loss and take-profit tools do not guarantee profitable trades, they play a critical role in maintaining discipline and managing risk over time.
Spot Vs Derivatives Vs Copy Trading
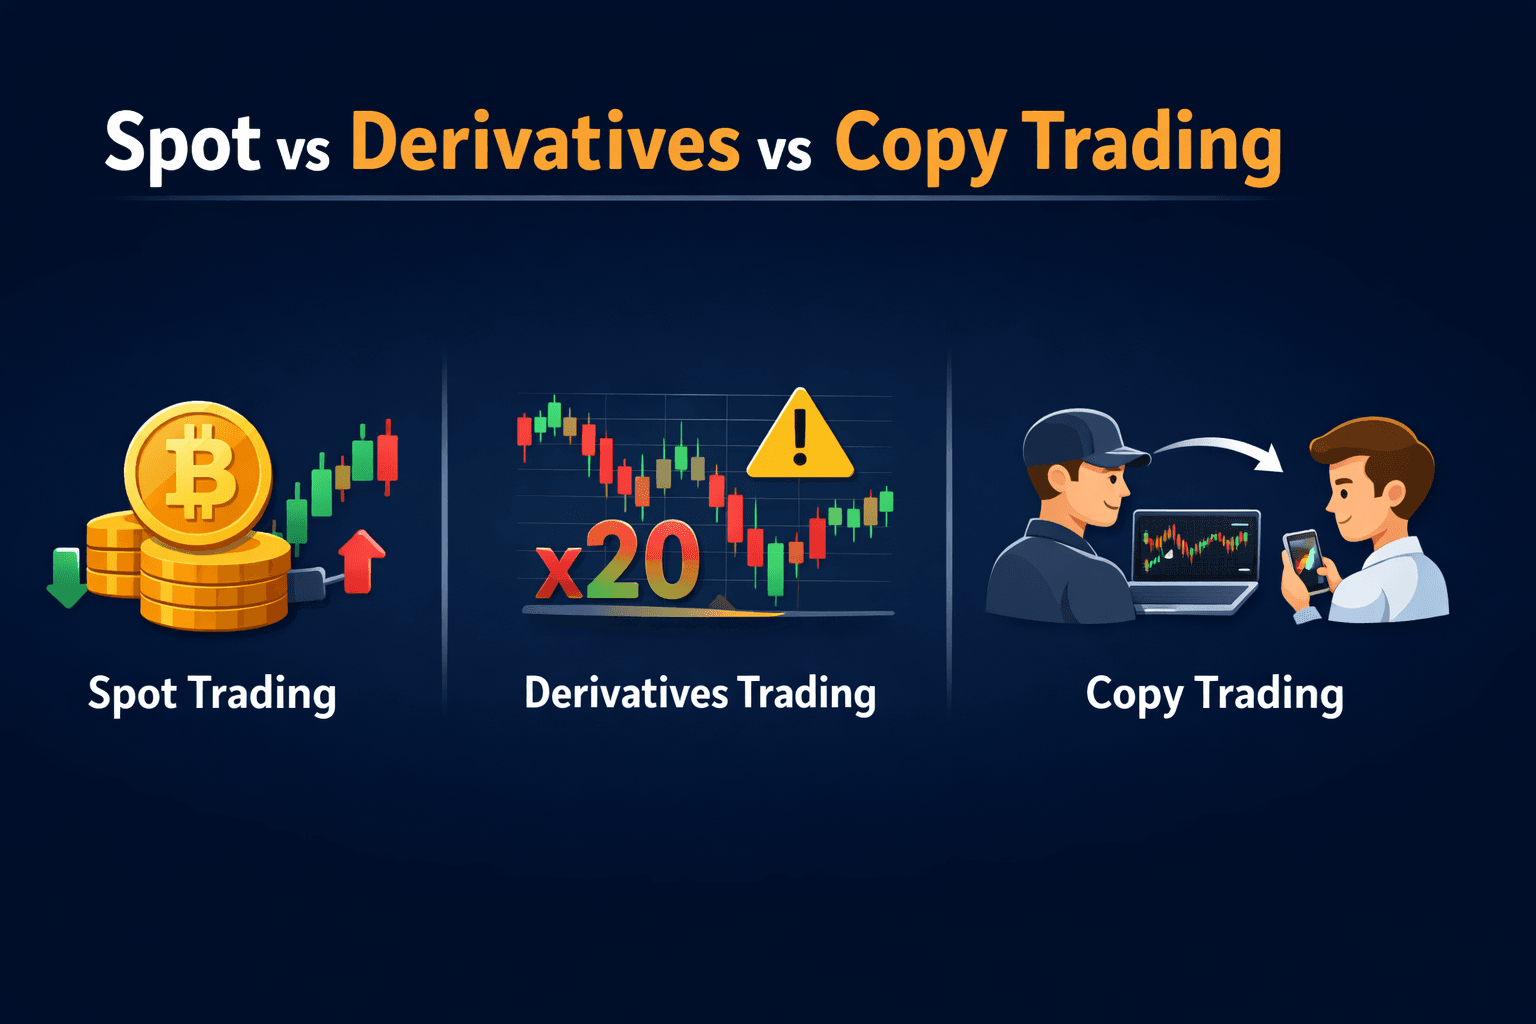
Understanding Different Trading Modes Available On Bybit Platform.
Once traders become comfortable placing Spot trades, they quickly notice that Bybit offers several additional trading environments. Alongside Spot markets, the platform provides derivatives trading and copy trading features that operate quite differently from standard buy-and-sell transactions.
For beginners, these options can feel confusing because each market type follows its own rules, risk structure, and trading mechanics. Understanding the differences helps traders avoid jumping into advanced products before they fully understand how those markets behave.
The three environments available on Bybit serve different purposes. Spot trading focuses on asset ownership, derivatives markets allow traders to speculate with leverage, and copy trading allows users to follow the strategies of other traders.
Before choosing where to trade, it helps to compare how these markets differ in complexity and risk.
Quick Comparison Of Trading Modes
Each trading environment on Bybit operates with a different level of complexity and risk exposure. The table below highlights the key characteristics that beginners should understand before choosing where to begin.
| Feature | Spot Trading | Derivatives Trading | Copy Trading |
| Complexity | Low | High | Medium |
| Leverage | None | Yes (can amplify gains and losses) | Depends on trader being copied |
| Liquidation Risk | No | Yes | Possible if copied trader uses leverage |
| Best For | Beginners learning market mechanics | Experienced traders managing risk | Passive participants observing strategies |
| Typical Starting Point | Most beginners start here | Only after understanding leverage | After understanding Spot trading basics |
| Key “Gotcha” | Price volatility | Liquidation from leverage | Blindly copying risky traders |
Spot trading stands out as the most straightforward environment because traders simply exchange one asset for another. The only risk involved is the price movement of the asset itself.
Derivatives trading introduces additional layers such as leverage, margin requirements, liquidation prices, and funding rates. These features can create opportunities for experienced traders but also increase risk significantly.
Copy trading sits somewhere in between. It allows users to follow the trades of experienced traders automatically, but it still carries risk because the copied strategy may experience losses.
Understanding these structural differences helps traders choose the right environment for their experience level.
Beginner Recommendation Ladder
Instead of jumping directly into the most complex trading products, many experienced traders recommend progressing through exchange features gradually.
The first stage should almost always involve Spot trading. Spot markets provide the cleanest way to learn how order books work, how trades execute, and how price movements affect account balances.
Once traders feel comfortable navigating the platform and managing basic risk controls such as stop-loss orders, the next step some users explore is copy trading. This feature allows beginners to observe how experienced traders structure their positions while maintaining some control over their own capital allocation.
Only after gaining a solid understanding of market mechanics do many traders begin experimenting with derivatives trading. Derivatives markets introduce leverage, which can magnify both profits and losses. Without proper risk management, leverage can lead to rapid account drawdowns.
Approaching the platform in stages makes the learning curve much more manageable. Spot trading builds familiarity with the interface, copy trading provides insight into strategy execution, and derivatives trading becomes more approachable once traders understand how risk behaves in volatile markets.
Derivatives Trading On Bybit
After spending time with Spot markets, many traders eventually become curious about derivatives trading. Derivatives markets are where some of the largest volumes in crypto occur, largely because they allow traders to speculate on price movements without directly owning the underlying asset.
On Bybit, derivatives trading includes products such as perpetual contracts, futures contracts, and options. These instruments allow traders to take both long and short positions, meaning they can potentially profit whether the market moves up or down.
However, derivatives markets introduce additional mechanics that do not exist in Spot trading. Concepts like margin, leverage, liquidation prices, and funding rates all play a role in how positions behave.
Before using leverage, it is important to understand what exactly is being traded and how these mechanisms affect risk.
What You’re Trading
In Spot trading, the transaction is simple: one asset is exchanged for another, and ownership transfers immediately. Derivatives trading works differently. Instead of buying the asset itself, traders are entering a contract whose value is tied to the price of the underlying asset.
On Bybit, the most widely used derivative product is the perpetual contract. A perpetual contract behaves similarly to a futures contract but does not have a fixed expiration date. Traders can hold positions indefinitely as long as they maintain sufficient margin.
Traditional futures contracts also exist in crypto markets. These contracts have a predetermined expiration date when the contract settles. Traders speculate on where the asset’s price will be at that future time.
A third category is options contracts, which give traders the right—but not the obligation—to buy or sell an asset at a specified price before a certain date.
Among these three products, perpetual contracts dominate crypto derivatives trading because they offer flexibility without expiration deadlines. Understanding which contract type you are trading is essential before opening any position.
Margin, Leverage, And Liquidation
The defining feature of derivatives trading is leverage.
Leverage allows traders to control a position larger than their deposited capital by borrowing funds from the exchange. For example, using 10x leverage means a trader can open a $10,000 position with only $1,000 of their own capital.
While this increases potential profits, it also increases risk. Even relatively small price movements can lead to large gains or losses when leverage is involved.
To manage this risk, derivatives markets use a system called margin. Margin represents the amount of collateral required to maintain an open position. If the market moves against the trader and the account’s margin balance falls below the required threshold, the exchange may automatically close the position.
This forced closure is called liquidation. It protects the exchange from losses but can result in traders losing most or all of their collateral if the market moves sharply against them.
For this reason, leverage should be used carefully and gradually as traders gain experience.
Step-By-Step: Opening A Small Derivatives Position
Although derivatives markets involve additional complexity, the process of opening a position still follows a logical sequence. The difference lies in the additional parameters that traders must consider before confirming the trade.
A typical derivatives trade on Bybit involves the following workflow:
- Navigate to Trade → Derivatives
- Choose the contract you want to trade (for example, BTCUSDT Perpetual)
- Select the leverage level
- Choose the order type (Market or Limit)
- Enter the position size
- Set stop-loss and take-profit parameters
- Confirm the position
One of the most important decisions in this process is selecting the leverage level. Beginners should start with very low leverage, often between 1x and 3x, while learning how liquidation levels behave.
Immediately after opening a position, it is good practice to define a stop-loss level. This prevents a small mistake from escalating into a large loss if the market moves unexpectedly.
Monitoring the liquidation price shown in the trading interface also helps traders understand how close their position is to forced closure.
Futures Risks
Because derivatives amplify both gains and losses, the risks involved differ significantly from Spot trading.
The most obvious risk is leverage amplification. A small price movement that might barely affect a Spot position can dramatically impact a leveraged position. Another factor to consider is market volatility. Crypto markets are known for rapid price swings, and leveraged positions can react very quickly to those movements.
Traders must also account for funding payments. In perpetual contract markets, traders periodically pay or receive funding fees depending on the balance between long and short positions in the market.
Finally, there is the risk of liquidation mechanics. If the market moves strongly against a leveraged position and margin levels fall too low, the exchange may close the position automatically to prevent further losses.
Because of these factors, derivatives trading should be approached carefully. Many experienced traders recommend gaining substantial familiarity with Spot trading and risk management before exploring leveraged markets.
Copy Trading On Bybit
Not every trader wants to analyze charts or actively manage positions throughout the day. Some users prefer a more passive approach where they follow experienced traders and mirror their positions automatically.
This is where copy trading becomes useful.
Bybit’s copy trading system allows users to allocate funds to a strategy run by another trader. Whenever the lead trader opens, modifies, or closes a position, the same trade is replicated proportionally in the follower’s account. For beginners, copy trading can act as a bridge between learning the market and actively trading themselves. It allows users to observe how experienced traders manage entries, exits, and risk without needing to execute each trade manually.
However, it is important to understand that copy trading is not risk-free. The performance of copied strategies can change over time, and poor strategy selection can still lead to losses.
Automatically Follow Experienced Traders Using Bybit Copy Trading. Image via
BybitHow It Works
Copy trading is a structured system for automatically mirroring another trader’s positions.
On the Bybit platform, experienced traders can register as lead traders. These traders make their strategies public so other users can follow them. Their historical performance, risk metrics, and trading history are displayed on the copy trading leaderboard. When a user chooses to follow one of these traders, the platform automatically replicates the trader’s positions using the capital allocated by the follower.
For example, imagine a lead trader opens a $10,000 position using their own capital. If a follower has allocated $1,000 to copy that trader, the system will replicate the position proportionally using the follower’s funds.
The follower does not control the individual trades themselves. Instead, they control the capital allocation and risk parameters used for copying. This distinction is important. The lead trader manages the strategy, but the follower decides how much capital is exposed to that strategy.
Step-By-Step: Copy A Trader With Guardrails
Although the copy trading process is automated, setting the correct parameters at the beginning helps protect the account from unnecessary risk.
The process usually begins inside the Copy Trading section of the platform. Here, users can browse a list of available traders along with performance statistics and risk metrics.
Once a trader is selected, the follower can configure several guardrails before copying begins.
The basic workflow typically looks like this:
- Open the Copy Trading dashboard
- Review the list of available traders
- Select a trader to follow
- Define the capital allocation
- Set maximum risk limits
- Confirm the copy relationship
One of the most important settings is the maximum allocation. This determines how much capital is exposed to the copied strategy. Beginners often start with small allocations while observing how the strategy performs.
Many platforms also allow users to define limits, such as maximum position size or stop copying conditions. These controls help prevent a single strategy from dominating the entire account.
Once the copy relationship is active, the system automatically replicates new trades initiated by the lead trader.
How To Pick Traders
Choosing the right trader to copy is arguably the most important decision in the copy trading process.
A common mistake beginners make is selecting traders based purely on the highest returns displayed on the leaderboard. Extremely high returns often come with equally high risk. Instead, a more reliable approach involves evaluating several key indicators.
One important metric is track record length. Traders with consistent performance over many months provide more reliable data than traders who have only performed well for a short period.
Another critical factor is drawdown, which measures how much the account has declined from its peak during losing periods. Strategies with extreme drawdowns often rely on aggressive risk-taking.
Consistency also matters. Traders who produce steady results over many trades are often more sustainable than strategies that depend on a few highly profitable positions. Finally, reviewing the number of completed trades provides insight into how active and experienced the trader may be.
Together, these indicators help users select traders whose risk profile matches their own tolerance.
Risks Of Copy Trading
Although copy trading simplifies the trading process, it still carries several important risks.
The most obvious risk is strategy dependency. When copying another trader, the follower relies entirely on that trader’s decision-making. If the trader begins making poor decisions or changes strategies, followers may experience unexpected losses.
Another factor to consider is slippage. Because copy trades are executed automatically across many accounts, the exact entry and exit prices may vary slightly from the lead trader’s position.
Market conditions can also change over time. A strategy that performed well in one market environment may struggle when volatility patterns shift.
For this reason, copy trading should be viewed as a learning tool rather than a guaranteed income strategy. Many successful users treat copy trading as a way to observe how experienced traders structure positions while continuing to develop their own trading skills.
Fees On Bybit
Bybit Trading Fees Explained For Spot And Derivatives Markets
Every exchange charges fees for executing trades. These costs are usually small on individual transactions, but over time, they can have a noticeable impact on trading performance, particularly for users who trade frequently or move in and out of positions throughout the day.
On Bybit, trading fees depend on several factors, including the type of market being traded, the order type used, and the user’s VIP level, which is determined by trading volume or asset balance held on the platform. Spot markets, derivatives markets, and certain advanced products each follow slightly different fee structures.
For beginners, the most important thing to understand is how fees apply to maker orders, taker orders, and different trading products. Once these concepts are clear, it becomes much easier to estimate the real cost of each trade and avoid habits that quietly increase trading expenses.
If trading costs matter to you, our analysis of crypto exchanges with the lowest fees compares platforms and explains where traders actually save money
Maker Vs Taker Explained Simply
The first concept every trader should understand is the difference between maker orders and taker orders, since this classification determines how the exchange charges trading fees.
A maker order is an order that adds liquidity to the market. This happens when a trader places a limit order that does not execute immediately and instead waits in the order book for another trader to match it. For example, if Bitcoin is trading at $60,000 and a trader places a buy limit order at $59,900, that order will remain visible in the order book until the market moves down to that price and another participant accepts the trade.
Because maker orders provide liquidity and help stabilize the market structure, exchanges reward them with lower fees or preferential rates.
A taker order, on the other hand, removes liquidity from the order book. This occurs when a trader places an order that executes instantly against existing orders already listed in the book. Market orders almost always fall into this category because they are designed to execute immediately at the best available price.
On Bybit’s standard fee tier for Spot markets, the maker and taker fees are typically the same:
- Spot Maker Fee: 0.10%
- Spot Taker Fee: 0.10%
Note: The fee rates may change based on Bybit updates, VIP tier, product, and region. Always verify the latest figures using Bybit’s official fee schedule before making cost-sensitive decisions.
Although the percentages appear identical at the base level, the distinction between maker and taker orders becomes more important as traders move into higher VIP tiers. At those levels, maker fees often decrease further while taker fees remain slightly higher, encouraging traders to provide liquidity rather than consume it.
Understanding this difference helps traders make informed decisions about when to use limit orders for better fee efficiency and when to use market orders for faster execution.
Spot Fees Vs Derivatives Fees
The fee structure for derivatives markets differs slightly from Spot trading because derivatives positions are calculated based on the notional value of the position, not just the capital initially deposited as margin.
In Spot trading, the fee is charged on the value of the executed trade. If you buy $1,000 worth of BTC, your fee is calculated on that $1,000.
In derivatives trading, the fee is charged on the notional value (the total position size), not the margin you posted. That means leverage can make your “real fee base” much larger than your deposit.
Bybit states that actual fee rates may vary by region and recommends checking the My Fee Rate page after completing identity verification for your precise account rates.
| Market type | Maker fee | Taker fee | How it applies |
| Spot trading (crypto-to-crypto) | 0.10% | 0.10% | Charged on the value of the executed trade. |
| Perpetual futures | 0.02% | 0.055% | Charged on the notional (total position size), not just margin. |
| Futures contracts | 0.02% | 0.055% | Same general maker/taker structure as perpetuals (rate depends on contract and account tier). |
Note: Bybit has announced Spot taker fee changes in certain regions, which is why it’s best to treat tables as “reference examples” and confirm your live rates inside Bybit before making cost-sensitive decisions.
These rates can decrease for traders who reach higher VIP tiers, which are determined by trading volume and account balances.
Because funding rates fluctuate with market conditions, they can either increase profits or reduce them depending on the direction of the position and the prevailing market sentiment.
Perpetual futures also include funding payments, which are exchanged between longs and shorts at set intervals to help keep the contract price aligned with the Spot market. Bybit’s help docs use an 8-hour interval as a common example, but the settlement frequency can vary by contract/system, so always check the current schedule on the product page.
Hidden Fee Traps Beginners Miss
Even though the listed trading fees may appear small, several common habits can cause traders to pay significantly more than expected over time.
One of the most frequent issues is overtrading. Entering and exiting positions too frequently generates repeated taker fees that slowly accumulate. A trader who places dozens of trades per day may end up paying far more in fees than someone who trades less often but with more deliberate positioning.
Another hidden cost comes from slippage, which occurs when market orders execute across multiple levels of the order book. When liquidity is thin or the order size is large relative to available orders, the final execution price may be slightly worse than expected. Although this is not technically a fee, it still represents an additional trading cost.
Derivatives traders must also consider funding payments, especially when holding positions for extended periods. These periodic payments between long and short traders can gradually reduce profits if the market remains heavily skewed in one direction.
Finally, many beginners underestimate how quickly costs accumulate when placing numerous small orders. While each individual trade may only involve a tiny fee, repeated transactions throughout the day can result in surprisingly high cumulative costs.
Managing fees effectively does not require complicated strategies. It mostly comes down to understanding how orders interact with the order book, using limit orders when appropriate, and avoiding unnecessary trade frequency.
Mobile Trading On Bybit
A large portion of crypto trading today happens on mobile devices. Markets operate twenty-four hours a day, and many traders prefer the ability to monitor prices, adjust orders, or close positions even when they are away from their desktop setup.
Bybit’s mobile application is designed to replicate most of the core functionality available on the desktop platform. Users can view charts, manage Spot and derivatives positions, monitor account balances, and execute trades directly from their phones. While the layout is simplified for smaller screens, the underlying trading engine and order execution remain the same.
Mobile trading should not necessarily replace a full desktop trading environment, especially for complex chart analysis or strategy planning. However, the mobile app is extremely useful for monitoring markets, managing open positions, and reacting quickly when price movements occur.
What You Can Do On Mobile
The Bybit mobile application supports most of the core trading functions available on the desktop interface. After logging into the app, users can access their account balances, view price charts, deposit or withdraw assets, and place Spot or derivatives trades directly from their device.
For everyday trading activities such as checking market movements, setting price alerts, adjusting stop-loss levels, or closing positions, the mobile interface is more than sufficient. The application also allows users to manage orders and monitor open trades in real time, which makes it particularly useful during periods of high market volatility.
That said, certain tasks remain easier to perform on desktop platforms. Chart analysis tends to be more comfortable on larger screens because traders can view multiple indicators, timeframes, and market pairs simultaneously. The desktop interface also allows for better visibility of the order book and deeper market data, which can be important when planning larger trades.
Because of these differences, many experienced traders use a hybrid approach. They perform detailed analysis and strategy planning on desktop devices, while using the mobile app for monitoring positions and executing quick adjustments when necessary.
Step-By-Step: Place A Spot Trade In The App
Executing a Spot trade through the Bybit mobile app follows a process very similar to the desktop platform, although the layout is optimized for touch navigation.
After opening the app and logging into your account, the main dashboard displays a summary of market prices and account balances. To begin trading, tap the Trade icon located in the bottom navigation menu.
Once inside the trading interface, the current market pair appears at the top of the screen. Tapping this area allows users to search for other trading pairs, such as BTC/USDT, ETH/USDT, or any other available market.
After selecting the desired pair, the chart and trading panel update automatically.
Below the chart, the order entry panel allows users to choose the type of order they want to place. Beginners typically start with a Market order because it executes immediately at the best available price.
The trading process generally follows these steps:
- Open the Bybit app and log in
- Tap Trade in the bottom navigation menu
- Select the trading pair (for example, BTC/USDT)
- Choose the Market order type
- Enter the amount to buy or sell
- Tap Buy or Sell to execute the order
Once the trade executes, the purchased asset appears in the account’s Spot balance. The transaction can also be reviewed under the Order History or Trade History sections within the app.
Mobile Safety Settings
Because mobile devices are frequently used on public networks or outside secure home environments, enabling additional mobile security settings is highly recommended.
One of the most useful protections is biometric authentication, which allows the app to require fingerprint or facial recognition before accessing trading features. This adds a quick but effective layer of protection against unauthorized access.
Users should also keep two-factor authentication (2FA) enabled for their accounts. Even if someone obtains the login password, the authentication code generated on the user’s device will still be required to complete the login or authorize withdrawals.
Another important habit is periodically reviewing the device management section of the account settings. This feature lists devices that have logged into the account recently. If an unfamiliar device appears, it can be removed immediately, which forces the session to terminate.
Together, these safeguards help protect trading accounts when using mobile devices.
Mobile Tips
Mobile trading offers convenience, but using it effectively requires a few practical habits.
One of the most helpful features available in the app is price alerts. These alerts notify users when an asset reaches a specific price level, which means traders do not need to constantly watch charts throughout the day.
Another useful practice involves keeping position sizes manageable when trading directly from a phone. Smaller screens make it easier to misread order details or accidentally enter incorrect quantities, so many traders reserve larger trades for desktop sessions where the interface is easier to review.
Finally, the mobile app allows users to monitor open positions and risk levels quickly. Even if trades are opened on desktop devices, the ability to review those positions from a phone adds flexibility and allows traders to react faster to sudden market changes.
Mobile trading is not intended to replace full trading setups, but it provides a powerful companion tool that keeps traders connected to the market at all times.
Withdrawals And Cashing Out
At some point, every trader needs to move funds out of the exchange. That may involve transferring assets to a personal wallet for long-term storage, sending crypto to another exchange, or converting profits back into fiat currency.
While the withdrawal process on Bybit is fairly straightforward, this stage is also where many costly mistakes occur. Crypto transactions are irreversible once confirmed on the blockchain, which means entering the wrong address or selecting the wrong network can permanently lock funds.
Understanding how withdrawals work, and following a few safety checks before sending funds, dramatically reduces the chances of errors. The steps below explain how the process works and what precautions traders should take before initiating any transfer.
Safely Withdraw Crypto Or Convert Funds From Bybit
How To Withdraw Crypto
Withdrawing cryptocurrency from Bybit involves transferring assets from your exchange account to an external wallet address. This external destination could be a personal hardware wallet, a software wallet, or another exchange account.
The process typically begins inside the Assets section of the platform. After navigating to this page, users will see a list of cryptocurrencies held in their account balances.
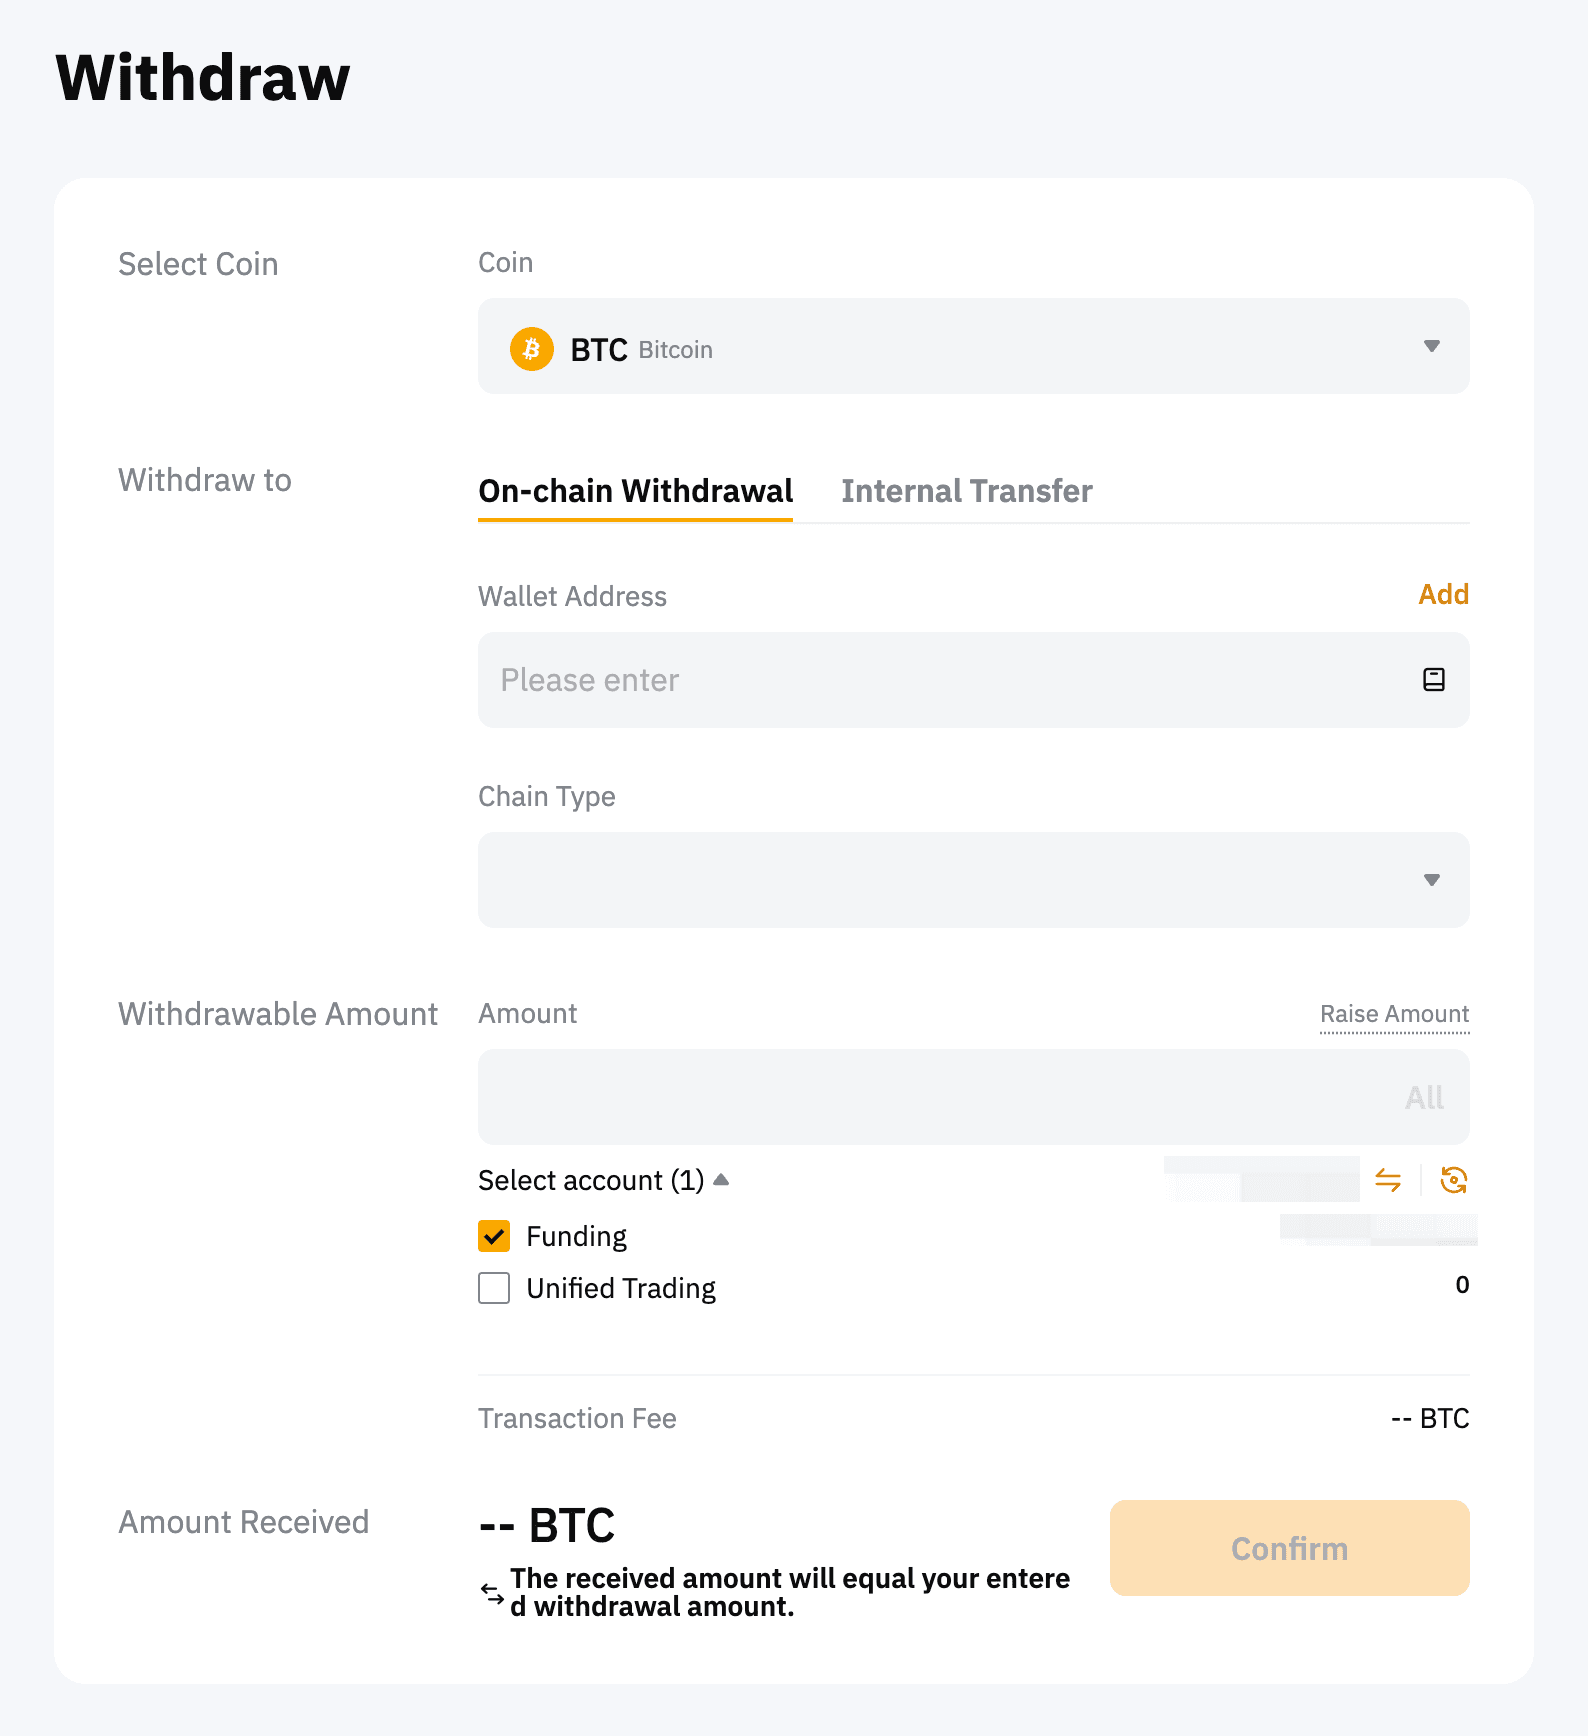
To start a withdrawal, locate the asset you want to transfer and select the Withdraw option. The platform will then request the destination wallet address and the blockchain network that should be used for the transfer.
This is one of the most important steps in the process. Many cryptocurrencies operate on multiple networks. For example, USDT exists on several blockchains such as Ethereum (ERC-20), Tron (TRC-20), and others. The selected network must match the network supported by the receiving wallet.
After entering the destination address and selecting the network, the user specifies the withdrawal amount. At this stage, the platform also displays the network fee, which is the cost required for the blockchain to process the transaction.
The withdrawal workflow generally follows this sequence:
- Navigate to Assets → Withdraw
- Select the cryptocurrency to withdraw
- Enter the destination wallet address
- Choose the correct blockchain network
- Enter the withdrawal amount
- Complete security verification (2FA or email confirmation)
Once confirmed, the exchange broadcasts the transaction to the blockchain network. The time required for completion depends on the network being used and the number of confirmations required before the receiving wallet credits the funds.
Withdrawing To Bank Or Fiat
Withdrawing cryptocurrency is consistent across most exchanges, but converting crypto to fiat and transferring it to a bank account depends heavily on regional payment infrastructure.
In many cases, users first convert their crypto into fiat currency through the platform’s supported payment services or through the peer-to-peer marketplace. Once the assets have been sold for fiat, the funds can then be transferred through the available payment method associated with the user’s region.
The availability of direct bank withdrawals varies by jurisdiction because financial regulations and payment partnerships differ from country to country. In some regions, bank transfers are integrated directly into the exchange interface. In others, users rely on peer-to-peer trading to convert crypto into local currency through verified payment methods.
Because these options can change over time, it is always worth reviewing the current withdrawal methods supported in your region within the platform’s funding section.
The “Test Withdrawal” Rule
One of the simplest but most effective precautions when moving crypto is performing a small test withdrawal before sending a larger amount.
A test withdrawal verifies several things at once. It confirms that the wallet address has been entered correctly, that the selected blockchain network matches the receiving wallet, and that the destination wallet is functioning properly.
Even experienced traders follow this practice when transferring funds to a new wallet or exchange. A small initial transfer ensures that the full withdrawal will arrive safely.
This extra step may seem unnecessary, but it acts as an additional layer of protection against human error. Since blockchain transactions cannot be reversed after confirmation, a quick test transfer can prevent mistakes that might otherwise result in permanent loss of funds.
If you plan to move assets off the exchange, review our breakdown of the best crypto wallets to understand which storage options offer the strongest security and usability.


